Using Sonoff Basic to control water heater
The only water heater in the apartment is installed in the guest bathroom. Sometime it is very troublesome to turn it on or off when I’m in the master room. It will be nice if I can just ask Google Assistant or Siri to turn on the water heater for me. Especially when I found out the water heater is not turn on right after I get into shower. So why not replace the old switch and automate it with a Sonoff Basic.
The water heater has a max load of 7.5A. So it is within the 10A limit of Sonoff Basic. The build will be simple. The only troublesome part is replacing the wall switch box and the wiring.
The existing wall switch consists of two 1-gang boxes.
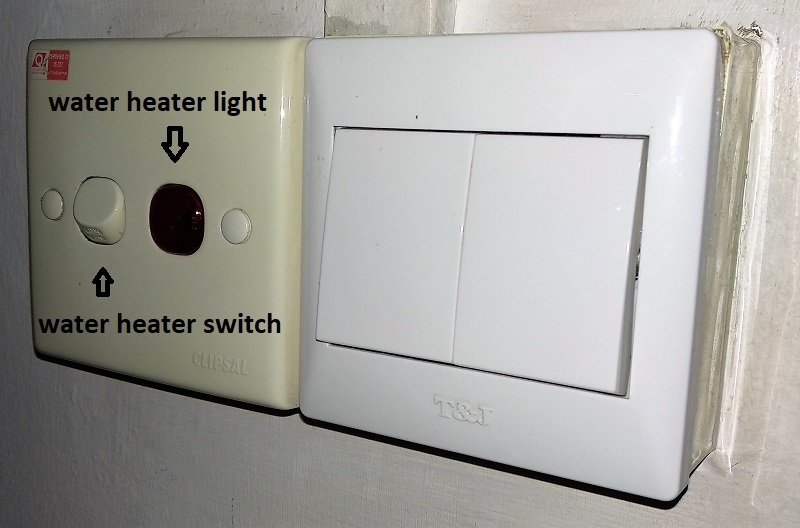
And there is a 220V small light bulb as the indicator light.
Since there is not sufficient room to house the Sonoff in the 1 gang back box, I need to get a 2 gang back box to house the Sonoff PCB. The Sonoff case is just too big.
| Parts | Qty | |
|---|---|---|
| 2-gang back box | 1 |  |
| Blank front plate | 1 | 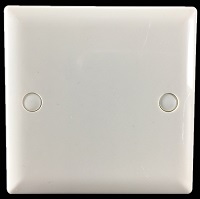 |
| New water heater switch | 1 | Just to reuse the small light bulb. |
| 8A Fuse and fuse holder | 1 | 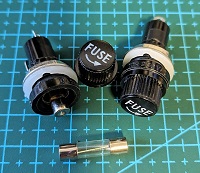 |
Prepare the Sonoff switch
Steps:
-
Setup Home Assistant configuration.yaml file with following section:
# MQTT mqtt: broker: core-mosquitto username: !secret mqtt_username password: !secret mqtt_password # Switch switch: - platform: mqtt name: "Water Heater" command_topic: "cmnd/sonoff01/POWER" state_topic: "stat/sonoff01/POWER" qos: 1 payload_on: "ON" payload_off: "OFF" retain: false -
Browse to Sonoff web console to setup WIFI and MQTT
-
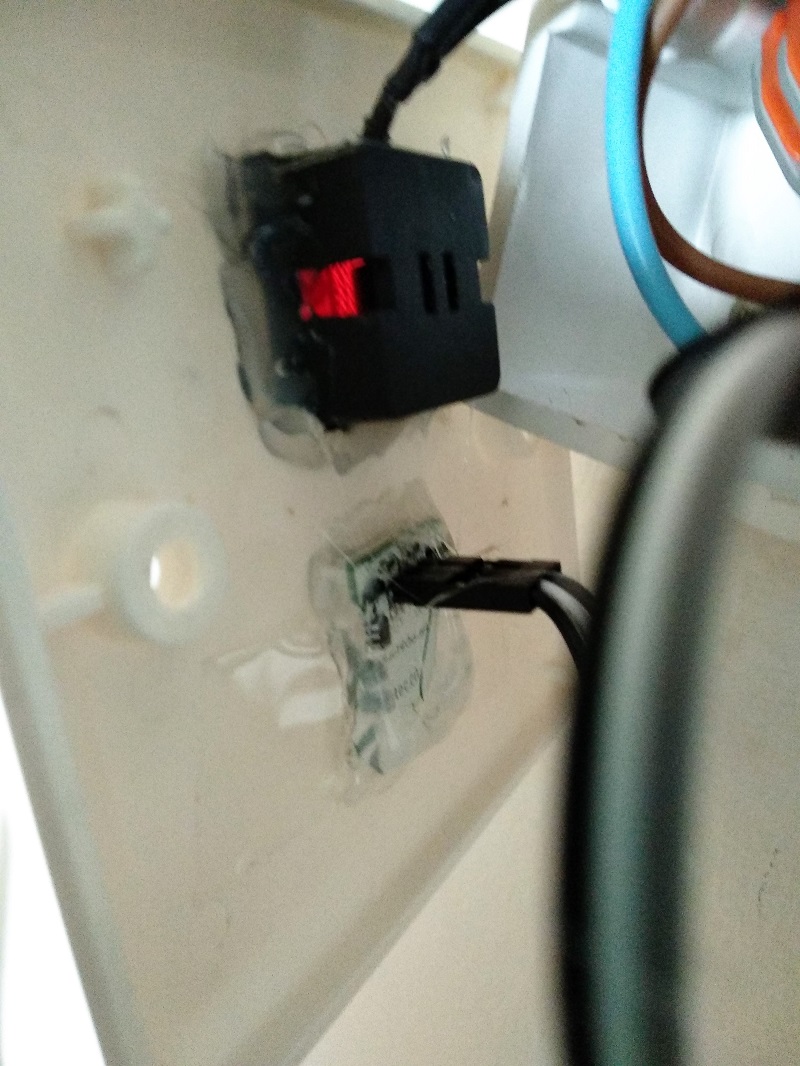
Take the small light bulb from the new water heater switch and connect it to the 22V output on Sonoff
-
Connect the Sonoff to a 220V source to power up the system.
-
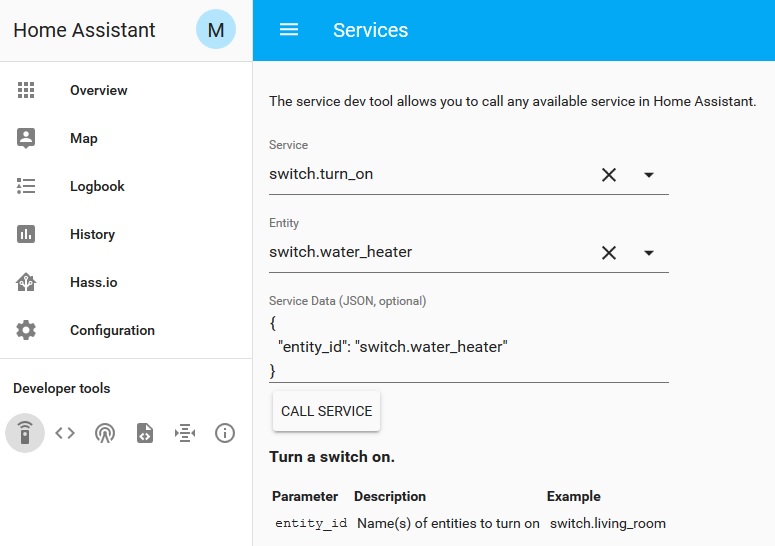
Time to test out the Sonoff. I put the whole assembly on a ceramic bowl for safety.

The Sonoff shall be able to turn on the red indicator light by pressing the little push button, or by touching the touch switch. In addition, the Home Assistant shall also be able to control it by calling service switch.turn_on.
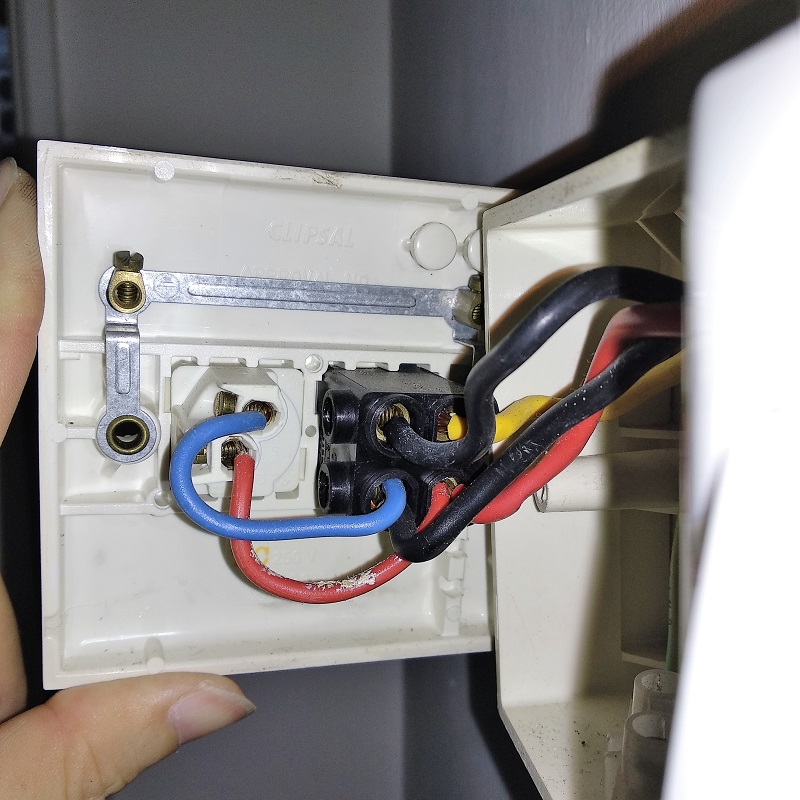
Replace the wall switch box
Steps:
-
Remove the old switch after turning off the main switch.

-
Replace the old 1-gang back boxes.
-
Put back the other switch front plate.
-
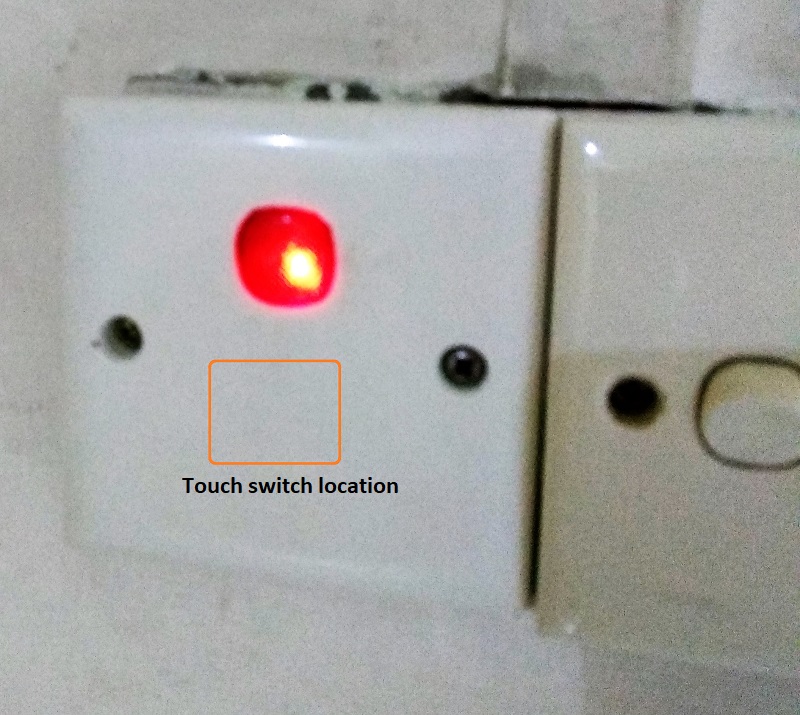
Drill a hole on the blank switch front plate for the little red indicator light.
-
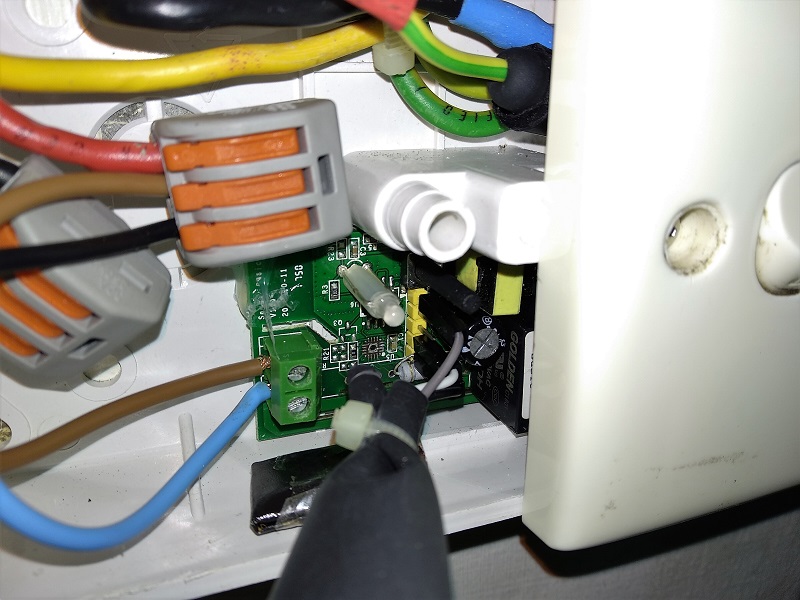
Hot glue the indicator light and touch switch on the back of the blank switch front plate.
-
Put a fuse, 8A - 10A, between the main 220V source (L) and the Sonoff (power in). This is to safeguard the Sonoff.
-
Connect the water heater to the Sonoff (power out) in parallel with the little red indicator light
-
Hot glue the Sonoff PCB board in the 2-gang back box.
-
Make a paper cone, use duck tape, or whatever you fancy to cover the green Sonoff LED if you don’t want to see the green status light.
-
Put back the blank switch front plate to the back box to finish the job.
-
After turning on the main power switch, the Sonoff Basic shall be able to control the water heater via the touch switch.
Add automation to the switch
I want to add the following rules to the water heater:
- Turn on water heater from 8 pm to 11 pm.
- Turn off water heater after 30 min of usage from 11 pm to 8 pm.
The following is the automations.yaml in Home Automation:
- id: '001'
  alias: Rule 1 - Turn on water heater 30 mins interval from 11 pm to 8 pm
  trigger:
    platform: state
    entity_id: switch.water_heater
    from: 'off'
    to: 'on'
    for:
      minutes: 30
  condition:
    condition: time
    after: '23:00:00'
    before: '20:00:00'
  action:
    service: switch.turn_off
    entity_id: switch.water_heater

- id: '002'
  alias: Rule 2 - Turn on water heater at 8 pm
  trigger:
    platform: time
    at: '20:00:00'
  condition:
    condition: state
    entity_id: switch.water_heater
    state: 'off'
  action:
    service: switch.turn_on
    entity_id: switch.water_heater

- id: '003'
  alias: Rule 3 - Turn off water heater after 11 pm
  trigger:
    platform: time
    at: '23:00:00'
  condition:
    condition: state
    entity_id: switch.water_heater
    state: 'on'
  action:
    service: switch.turn_off
    entity_id: switch.water_heater
Let Siri controls the water heater
Please following Home Assistant - HomeKit integration instruction to enable Siri voice control. You will need HomePod, Apple TV, or iPad as a home hub to control the water heater from outside of your network.
Let Google Assistant controls the water heater
Please following Home Assistant - Google Assistant integration instruction to enable Google Assistant voice control. The instruction can be a little confusing. Just read it carefully and you will get there. Also, do get Duck DNS plug-in installed first, as Google requires a secured endpoint.